Image Map

Wednesday 27 March 2013

Everyday Makeup | Foundation & Base

Everyday Makeup Products Foundation Base Rimmel Stila Urban Decay Benefit Collection 2000 Review Belle-amie
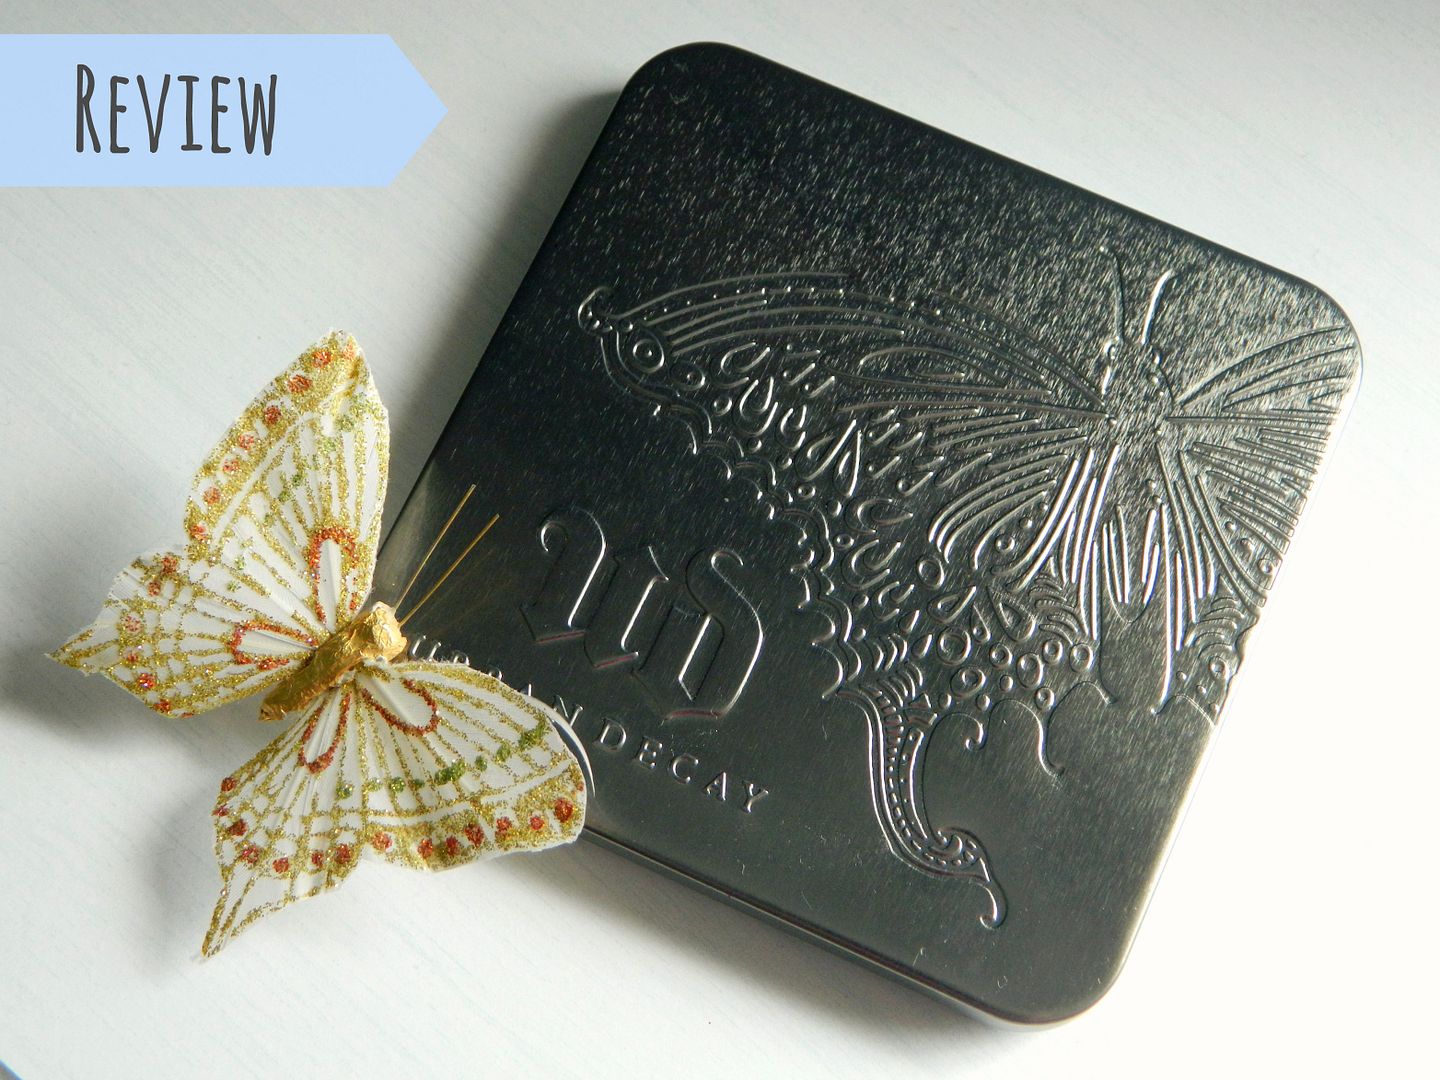
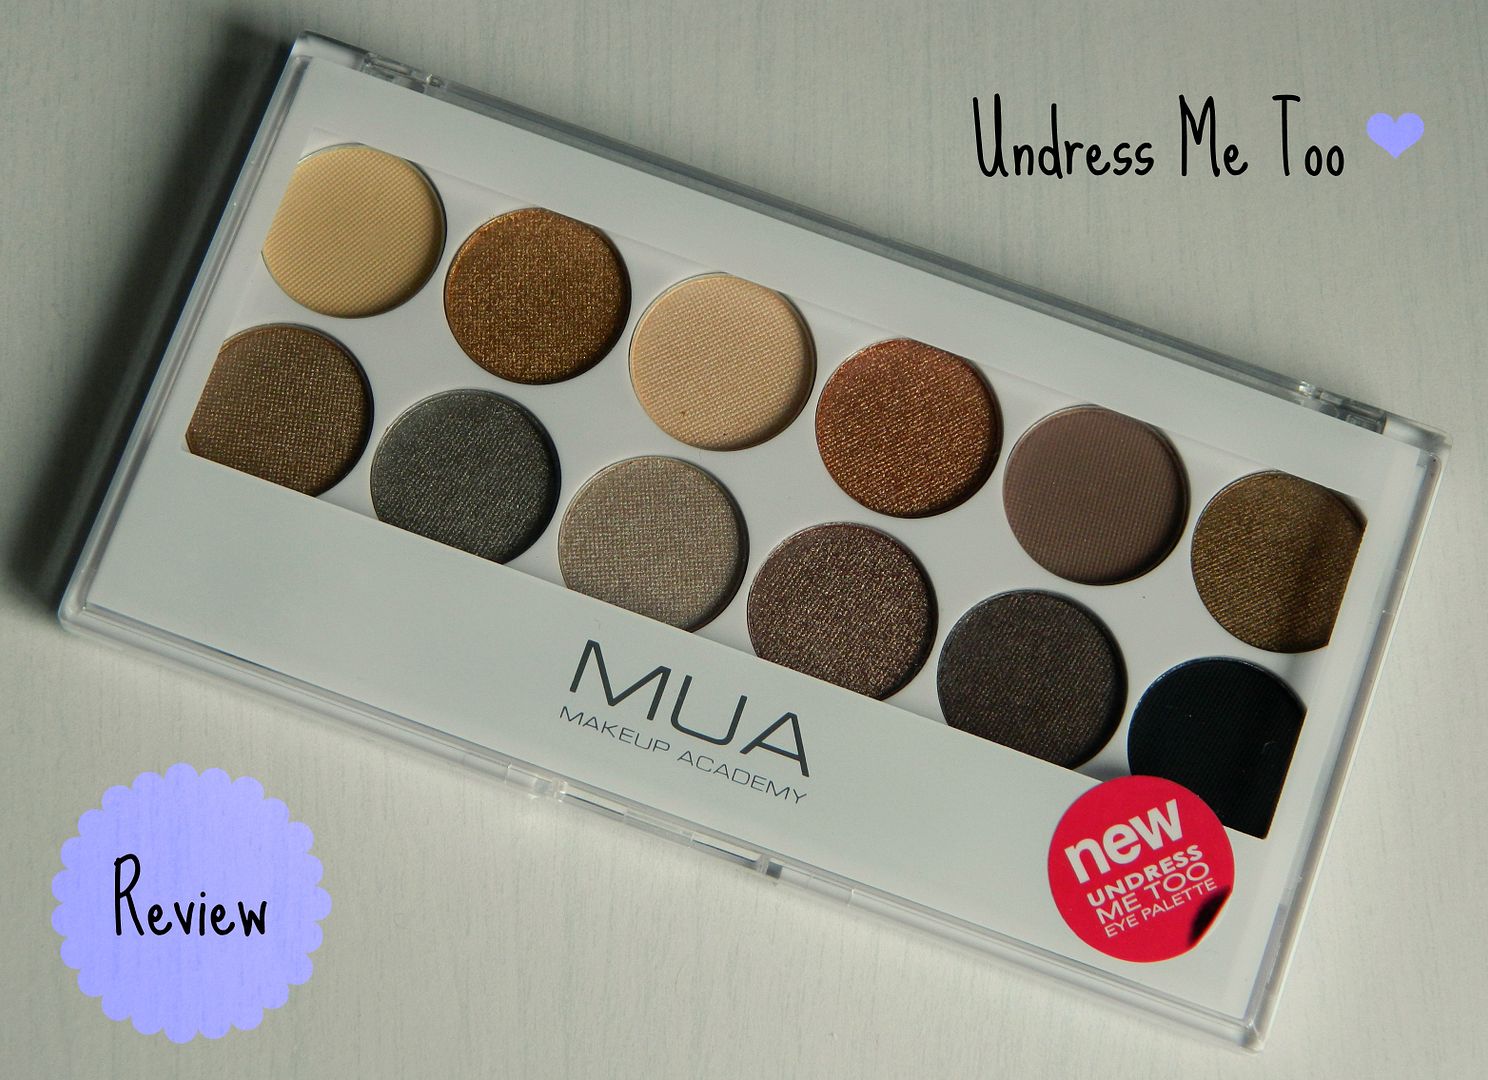
Hello lovelies and welcome to the first part of a 3 post "mini-series" where I show you what makeup I use on a daily basis! The 3 posts will be about: Base makeup, Eye makeup and Lip makeup. In this post I'm going to talk about what products I use as a base, this includes things like primer, foundation and blusher. The products in these posts aren't what I use every single day I wear makeup, but the ones I reach for the most out of my collection! For example, I like to switch up my foundation or blusher depending on the look I am going for, but I've picked out the ones I really enjoy using! Now after that little introduction, on to the post!

| Primer |
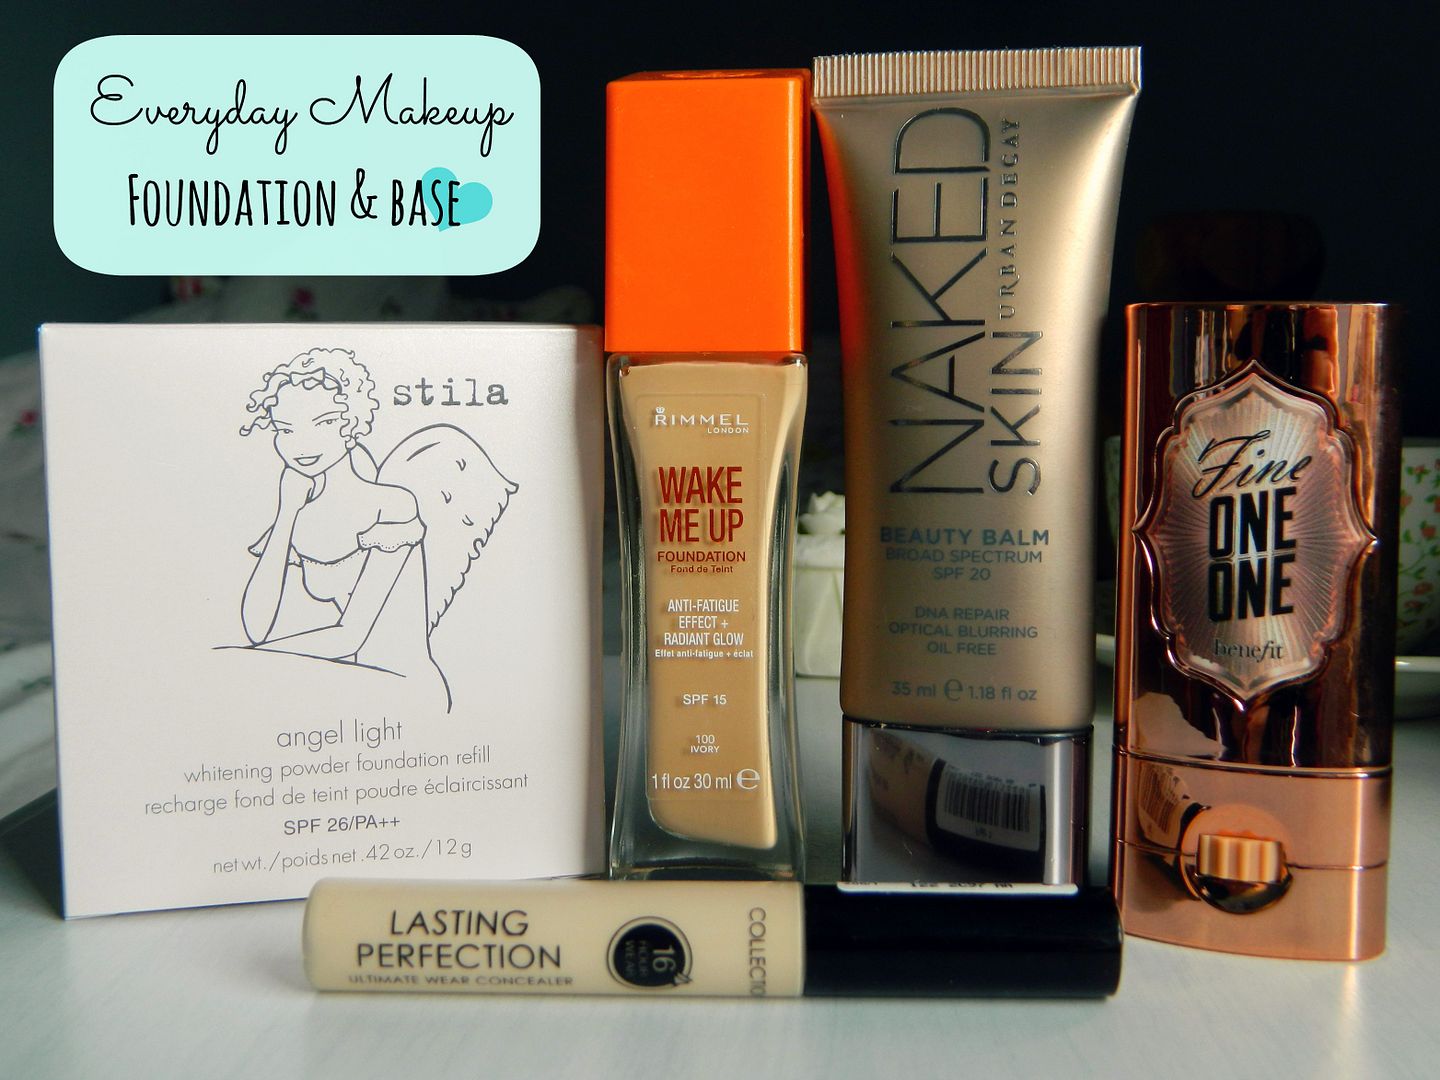
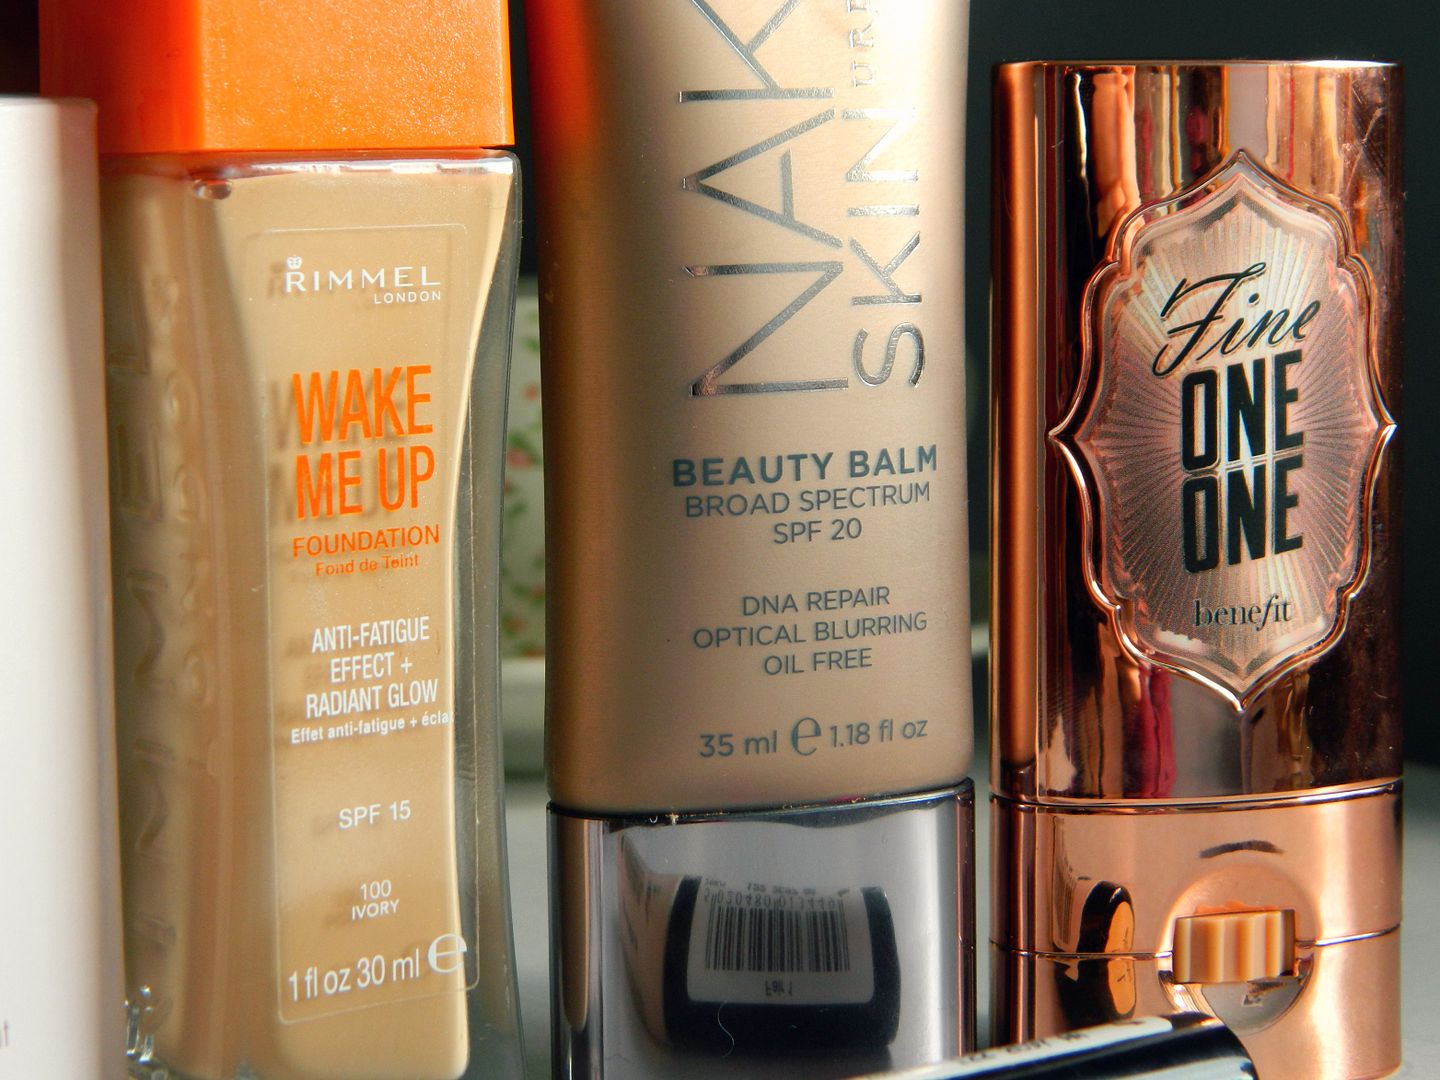
My favourite product to use as a primer, despite not technically being one, is the Urban Decay Naked Skin Beauty Balm*. As a BB cream, I actually don't like this product very much, but when used under your foundation it's absolutely amazing! It allows my foundation to apply smoothly and evenly across my face and makes it last all day! This product also has a lot of benefits to the skin including hydration and protecting it with SPF 20. An SPF is vital in a face product as it will help defend your skin from the sun's UV rays, which in turn, will help your skin age better! To see a full review of the Urban Decay Naked Skin Beauty Balm, click HERE.

| Foundation |
My everyday foundation is the Rimmel Wake Me Up in shade 100 Ivory. I'm pretty sure every beauty blogger has tried or at least heard of this amazing foundation! This foundation offers a light to medium coverage but it definitely buildable, so is great for most people. When applied over the Urban Decay Beauty Balm with my Real Techniques Buffing Brush, I get a lovely and flawless finish. It's really nice to apply and for me, doesn't go patchy or wear off quickly! This has to be one of my favourite foundations I've tried!

| Concealer |
Again, this is another beauty cult favourite, the Collection 2000 Lasting Perfection Concealer. I repurchased mine in the shade Fair 1 as I found Light 2 to be a little bit dark for my skin at this time of year. The coverage of this concealer is amazing and will cover up almost any blemish or flaw! I also like how this shade is a tiny but lighter than my skin so is perfect at covering and brightening my under eye dark circles.

| Blusher |
The Benefit Fine One One is probably one of the prettiest makeup items I have in my collection! As it is a cream formula, I would apply it before my powder to avoid it going cakey on my skin. This blush comes in a stick form which 3 different shades: Pink Champagne, Sheer Watermelon and Soft Coral, all of which are beautiful blusher colours. You simply swipe it across the cheek, blend and then your done! All your blusher and highlighting done in 2 simple steps. If you would like to see a full review of this product, please let me know in the comments!

| Powder |
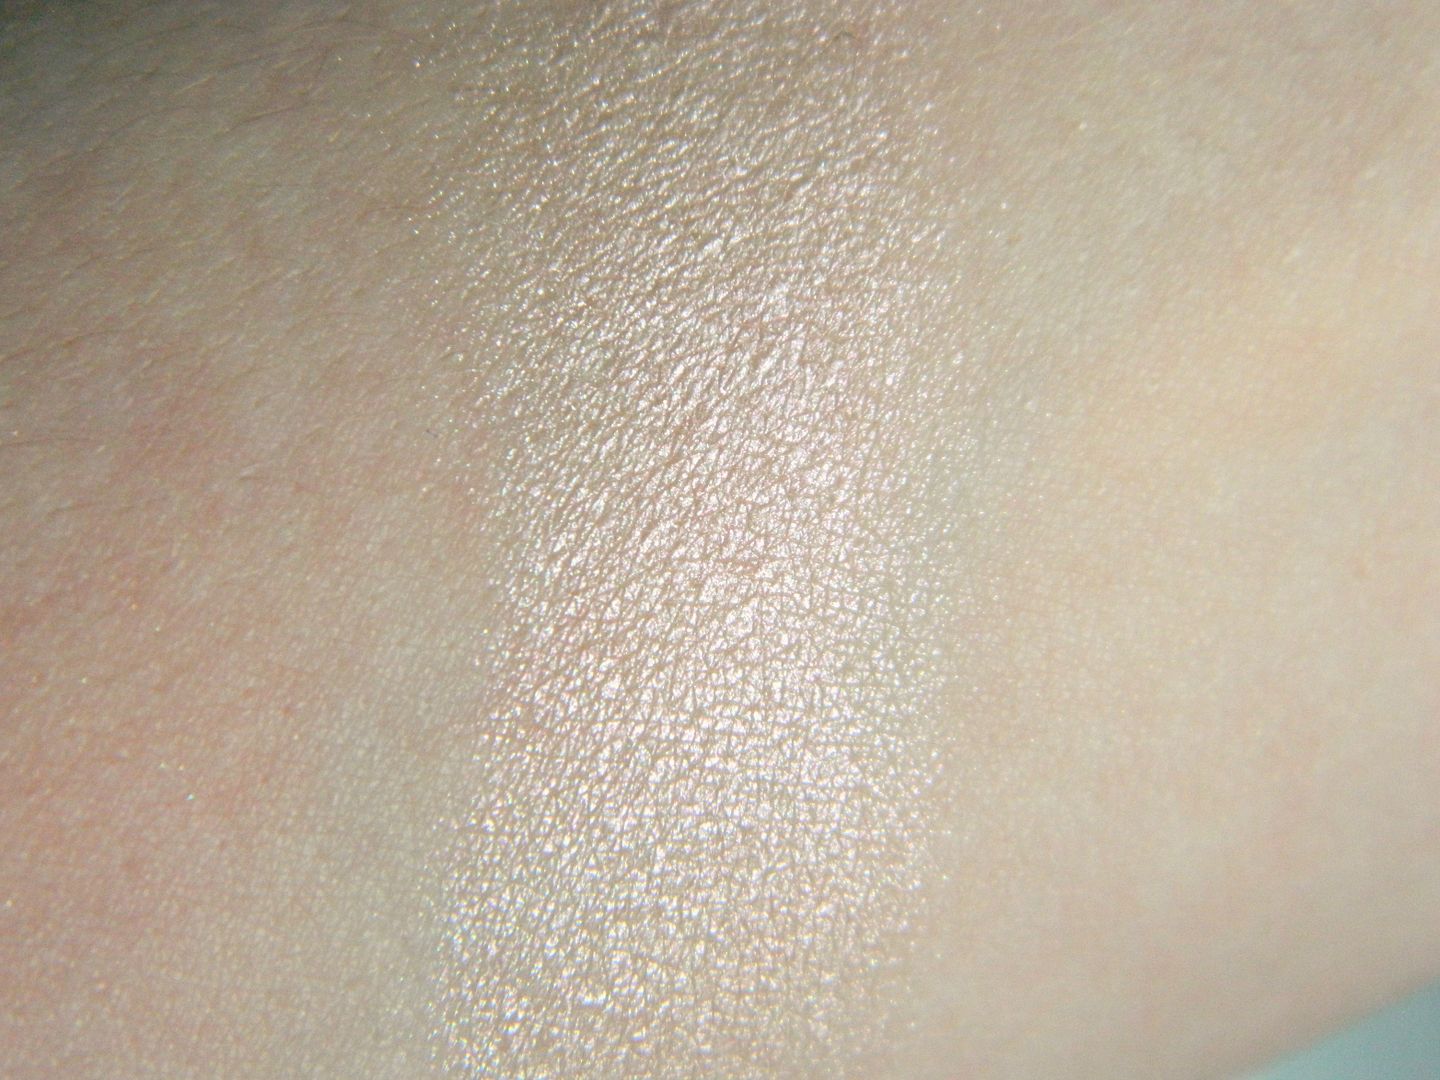
Finally, the last face product I apply is my Stila Angel Light Whitening Powder in Shade B. This is just a refill as I actually found this product in Poundland last year. I loved this powder so much that I bought about 6 of them, which considering I'm still on my first one, shows they were an absolute bargain! Even though this is a pressed powder, I've never had any issues with cakeiness, it just leaves my skin matte and flawless looking! This powder does come with a little sponge, but I prefer to use The Body Shop Face & Body brush for an amazing finish!

So that's all the products I use on my face to create the base of my makeup. My next post will go into what products I use on my eyes and brows! Please let me know if you liked this post and whether you'd like to see the next one in the series!

What products do you use for your base makeup?

Friday 22 March 2013

Review | Urban Decay Mariposa Palette

Urban Decay Mariposa Palette Review Belle-amie
Urban Decay Mariposa Palette Shades Colours Review Belle-amie
Urban Decay Mariposa Palette Shades Swatches Review Belle-amie

Today I'm going to review this beautiful little palette from Urban Decay; the Mariposa palette. This palette contains 10 shimmery eye shadows which range from golden neutrals to bright pinks and blues! I originally found this palette on the Fragrance Direct website for just £11 and instantly put it on my Christmas wish list. My parents kindly got this palette for me and I was so excited to try it out! Being a huge fan of shimmery eyeshadow I thought this would be a lovely palette to add to my collection!

As you can see this palette offers a range of colours and shades to choose from to make an endless amount of eye looks! It comes in a slim, silver tin which makes it very sturdy and strong. The Mariposa palette also comes with a travel sized flat shader brush which is really good quality and makes this palette perfect for travelling with! The main decoration of this palette is butterflies and I love the design on the front and on the inside! 
In this palette you get 10 different shades, 4 of which are exclusive to the palette:

Rockstar - a dark metallic eggplant purple with shimmer.
Gunmetal - a dark grey with silver micro-glitter.
Skimp -  a peachy nude with shimmer.
 Infamous (exclusive) - a fuchsia shimmer with a slight duo-chrome.
Wreckage (exclusive) - a medium taupe with gold shimmer.
Haight - an aqua blue/ green with shimmer.
Money - a green/ silver with shimmer. 
Mushroom - a medium grey shimmer with brown undertones.
Spotlight (exclusive) - a light golden champagne with shimmer.
Limelight (exclusive) - a light bronze with golden shimmer.

As always most of these shadows are soft, extremely pigmented and really easy to blend. The only exceptions I find is that Infamous isn't as vibrant as it could be, but being the shade I've used the least means it doesn't really bother me! I also find Limelight less pigmented and not as easy to work with like the rest of the shades. Apart from those 2, the eye shadows are amazing! For me, Rockstar is a perfect shade to put in the crease as the purple tones really suit my brown eyes and brings out my eye colour! I'm also in love with the shades Mushroom and Spotlight as they are such versatile shades to create everyday looks. With an eyeshadow primer these shadows will last you all day with minimal creasing. 

Overall I love this little palette and offers a great selection of neutral colours which I really enjoy using. I don't find myself reaching for the brighter shades like Haight and Infamous as I'm not confident to wear them just yet. I think these will be perfect to use in the Summer time as a pop of colour on the lash line, especially Haight!

Have you tried the Urban Decay Mariposa Palette? What are your thoughts on it?

Tuesday 19 March 2013

Review | Barry M Gelly Hi-Shine Nail Paints

Barry M Gelly Hi Shine Nail Paints Review Belle-amie
Barry M Gelly Hi Shine Nail Paints Blueberry Grapefruit Prickly Pear Plum Review Belle-amie
Left to right: Blueberry, Grapefruit, Prickly Pear & Plum
Barry M Gelly Hi Shine Nail Paints Blueberry Grapefruit Prickly Pear Plum Swatches Review Belle-amie

I have always been a huge fan of Barry M's nail paints and over the years, I have collected quite a few of them! The quality and range of their nail paints is amazing for how cheap they are. One of the latest collections to be released was the "Gelly Nail Effects" which are meant to look like gel nails. I fell in love with the colour selection and decided to pick up two in Blueberry and Prickly Pear. I was then lucky enough to win Chelsea's, from Through Chelsea's Eyes, giveaway where I received 2 new shades in Grapefruit and Plum (plus another Prickly Pear which I gave to my mum because she loves lilac nail polish!).

I'll be honest and say that when I first tried these nail paints, I was rather disappointed! I found that they applied really thin and streaky and just didn't live up to the standard nail paints! However, I later found out that you need to apply these nail paints much thicker than normal nail polish in order to have an opaque finish. Or, you could build up lots of thin layers for the same result, but I don't think I would have the time to do that. In the photo I am wearing 2 thick coats of each polish and as you can see the result is lovely! These polishes are really nice to apply and the finish is opaque and glossy without the need of a top coat! But, because you need to apply so much nail polish, the drying time is so long! They take forever to touch dry and even after then you have to be extra careful because it's so easy to smudge and ruin the polish. I also find that once they are dry, as there's so much polish on your nail, they're quite easy to peel off and chip so a thin layer of top coat is essential to keep them on your nails!

Despite these faults, I think these nail paints are lovely and absolutely perfect for Summer! The colour selection is amazing and there isn't a shade that I wouldn't buy. If you love the look of bright, glossy nails then these nail paints will be perfect for you. There is also a Summer collection of shades which include: Lychee, Dragon Fruit, Greenberry and Papaya, all of which look so pretty. Papaya and Dragon Fruit are definitely the next ones to buy on my list though, especially that Barry M nail paints are usually on offer!

Have you tried the Barry M Gelly Hi-Shine Nail Paints?

Saturday 16 March 2013

Nails Of The Day | Royal Botanical Gardens

Nails Of The Day Nails Inc Royal Botanical Gardens Summer 2013 Nail Polish Review Belle-amie

Recently, I have been searching for all different shades of mint and blue nail polish ready for Spring and Summer. If you're a reader of my blog, you will know that I am loving this colour nail polish at the moment and cannot wait for Summer so I can wear it everyday! I was kindly sent a Nails Inc nail polish in, what I can only say, the more perfect shade ever! This is Royal Botanical Gardens and is part of the Spring/ Summer Trend Shades collection. The other shades available are: Chelsea Physic Garden (aqua blue), Kensington Palace Gardens (coral pink) and St James Park (pillar box red). I must say, Nails Inc is one of the best brands at giving names to their products, they always sound so cute!

Royal Botanical Gardens is a beautiful cool mint green shade which looks seriously bright on the nails! This shade is absolutely perfect for me right now as I'm loving mint/ blue nails, but only have a couple shades in my collection. The colour is completely opaque in 2-3 coats and applies really easily like all Nails Inc polishes I have tried. It has a glossy finish and looks great with or without a top coat. When I wore this, I actually forgot to put a top coat on and I found it chipped on 1 nail within a day. However, I'm sure paired with a top coat this will last much longer!

Nails Inc are one of my favourite nail polish brands for shades, quality and innovative effects! I would definitely recommend you picking up any shade (or all of them!) from this collection as I think they're all stunning!

Nails Inc polishes are available from the lookfantastic.com website with free delivery!

Have you tried the new Spring/ Summer shades by Nails Inc?

Friday 15 March 2013

Review | Makebelieve Enhance Makeup

Makebelieve Enhance Makeup Shimmer Lip Gloss Glow Tinted Moisturiser Review Belle-amie
Makebelieve Enhance Makeup Glow Tinted Moisturiser Review Belle-amie
Makebelieve Enhance Makeup Glow Tinted Moisturiser Swatch Review Belle-amie
Makebelieve Enhance Makeup Shimmer Lip Gloss Review Belle-amie
Makebelieve Enhance Makeup Shimmer Lip Gloss Swatch Review Belle-amie

Morning everyone! I hope you're all well after the Google incident that was all over Twitter yesterday haha! I for one really hope they don't get rid of GFC as I find it such an easy way to follow new blogs and keep in touch with them. Many bloggers are now resorting to following blogs over on Bloglovin' as a "just in case", so if you want to do the same for mine, click THIS LINK HERE. Thank you!

So today, I have a couple of makeup items I want to review for you! They are from the brand Makebelieve and before now, I had never heard or tried them! The Makebelieve brand have the "passion to develop self-tanning and makeup products that compliment a diversity of skin types" and want their products to make you feel good about yourself! I have two products from the "Enhance" makeup selection, but do the products live up to the promise?

The first product I have is the Makebelieve Enhance Glow Tinted Moisturiser which comes in 1 shade for all skin colours. It is a hydrating and lightly tinted moisturiser that is meant to give a glow to the face. I'm always worried about face products that come in 1 shade because I'm quite pale, chances are it won't suit my skin tone! For me, this tinted moisturiser was a little bit too dark, even when blended out. I think I will have to try this out in the Summer when I should have a more of a tan and it will hopefully suit me better! To give your face the glow, there is some fine, gold shimmer in the moisturiser which really catch the light. It is a little bit noticeable, so if you're someone who doesn't like shimmery makeup, you probably won't like this! Again, this is a feature in a product that I think will be best suited for Summer as I don't think it fits in with the English weather right now! The coverage of this product is very light and almost sheer, so I would recommend this if you're comfortable with your skin and want that tanned glow to your face! It lasted on my skin for around 4-6 hours but I find it difficult to see when a tinted moisturiser has worn off as they're sheer to begin with anyway! One problem I have with this product is that it doesn't have an SPF in it. I think if you're designing a product that's perfect for Summer, you need to have sun protection in it!

The next makeup item is the Makebeliebe Enhance Shimmer Lipgloss. Again this comes in 1 shade which is a light peachy pink and I think it will suit any skin tone! I think this is my favourite product out of the two. It looks so pretty in the tube and once applied, is an almost sheer shimmer lipgloss so it looks perfect on its own or layered over any coloured lipstick. This lipgloss isn't sticky at all and has a faint smell of what I think is grapefruit! On the lips this gloss will probably last around 1 hour but as it has the plastic applicator on the tube, it's super easy just to re-apply throughout the day! It's a really lovely lip product and the kind of one any girl should have in her makeup collection!

Overall, I think Makebelieve's makeup is really good and lives up to what they want in terms of the lipgloss, but I think it's hard to have a "one shade fits all" face product. I will definitely give this another go in the Summer and let you know what I think then!

Makebelieve products are available on the lookfantastic.com website with free delivery!

Have you tried Makebelieve's "Enhance" makeup range?

Tuesday 12 March 2013

Review | Makeup Academy Undress Your Skin Highlighter

Makeup Academy Undress Your Skin Highlighter Review Belle-amie
Makeup Academy Undress Your Skin Highlighter Swatch Review Belle-amie

Today I have another MUA product from the "Undress" range to review for you! I recently picked up the new highlighter powder after lusting after how beautiful it looked in the pan. I don't have many highlighters in my makeup collection and thought this would be a great piece to add to it!

The Undress Your Skin Highlighter is a lightweight baked powder that is designed to illuminate the skin with a fine layer of shimmer. This highlighter suits all skin tones as it is a natural, pink/ shell shade and looks amazing on the cheek and brown bones. To apply, I swirl my Real Techniques Contour Brush in the powder and apply it to my cheek bones, just above my blusher. I find the pigmentation of this powder is perfect for me as a small amount gives my cheeks a lovely, natural looking glow!  You could definitely build the pigmentation up though if you prefer a stronger looking highlight! I find that this highlighter lasts about 4 hours on my skin (with a primer underneath) and then needs a touch up!

I think it was the look of product that sold me on this, it looks stunning in the pan and the detail of the powder is amazing for just £3! I really think MUA have done well with this and makes it look more expensive than it actually is! It also comes in a white, round plastic pot which I do like, but of course, isn't the nicest packaging around.

Overall I think for just £3, this is such a lovely highlighting powder and looks just like a high end product. This is now a part of my everyday makeup and I'm loving it! I'm glad I've managed to pick this up as I've heard it keeps selling out in most Superdrug stores, so is definitely a popular product! At the moment the Undress Your Skin Highlighter is just £2 on the MUA website, so there's no better time like now to pick it up!

Have you tried the Undress Your Skin Highlighter? What are your thoughts on it?

Friday 8 March 2013

Review | Makeup Academy Undress Me Too Palette

Makeup Academy Undress Me Too Palette Review Belle-amie
Makeup Academy Undress Me Too Palette Shades Colours Review Belle-amie
Makeup Academy Undress Me Too Palette Shade Swatches Review Belle-amie

So as you may know, MUA already have an eyeshadow palette called "Undressed" (review HERE) which is meant to be a high street dupe for the Urban Decay Naked palette. Now, there is a second palette that is meant to be the equivalent to the Urban Decay Naked 2 palette called "Undress Me Too". I really liked the original "Undressed" palette, so had high hopes for this one too! Also, as I don't own the Naked 2 palette, I thought this would be the perfect way of creating similar looks, just at the fraction of the price!

The "Undress Me Too" contains 12 neutral eye shadows that range from shimmery champagnes to a matte black, meaning you can create endless amounts of eye looks. Anything from a simple day look to a darker, bronze smokey eye is possible with this palette! I also love how these shadows have names and it makes it so much easier to refer to shades in the palette!

Naked - a matte cream bisque
Devotion - a shimmery golden bronze
Shy - a shimmery off-white
Fiery - a shimmery copper
Lavish - a matte taupe
Dreamy - a shimmery dark bronze
Tranquil - a shimmery golden champagne
Exposed - a shimmery light grey/ brown
Reveal - a shimmery light silver toned grey/ brown
Wink - a shimmery silver bronze
Obsessed - a shimmery deep brown
Corrupt - a matte black

As you can see from the swatches, the matte shades kind of let this palette down! I know that mattes are usually less pigmented, but I'm so disappointed that Naked didn't even show up on my skin, even after packing on loads of shadow! Luckily, there's only 3 matte shades and I personally prefer to wear shimmers, so I haven't really worn these 3. As for the rest of the shadows, I love the colour selection and how pigmented they are for just £4! I like to wear Tranquil over the lid, then put Dreamy and Obsessed into the crease and then use Reveal as an inner-corner highlight for an everyday look! With an eye shadow primer, these shadows can last all day with little creasing but I find the lighter shades can fade a bit quicker than the others.

As for the packaging, I like that they've changed it to white and that the "Undress" collection can be identified from the original collection. It's still made from plastic and is quite prone to breaking, but I'm sure if you look after it the palette will last well! Like many MUA palettes, this one also comes with a sponge tip applicator, which I do like to use to put on lighter shades for my inner-corner.

Overall, this is a lovely palette and a brilliant way to try out the Naked 2 shades for just £4! I think I prefer the original "Undressed" palette but I would still recommend this palette to anyone!

Have you tried the Undress Me Too palette?

Wednesday 6 March 2013

Glamour Magazine | Percy & Reed

Glamour Magazine Percy And Reed Freebies March 2013

I feel like I haven't done a "Magazine Freebie" post in such a long time, so I was really excited when I heard there were some Percy & Reed hair care products in this month's Glamour magazine! Percy & Reed isn't a brand I've tried before and this is what I love about free products with Glamour, you can try new brands for just £2! With this month's issue you can collect: the Radiant Colour & Shine Shampoo, the Radiant Colour & Shine Conditioner, the Flawless Finishing Polish and the Volumising No Oil Oil for fine hair together worth £41! As you can see, the packaging is so adorable and the perfect size for travelling!

 Really Rather Radiant Colour & Shine Shampoo 100ml (full size £14 LINK)
This shampoo is designed to give your hair extra depth and gloss. It contains raspberry oil that helps coloured hair shimmer and shine and pro vitamin B5 to add strength! This shampoo has a lovely scent to it and I can't wait to try it out. 

Really Rather Radiant Colour & Shine Conditioner 100ml (full size £16 LINK)
This is the matching conditioner to go with the shampoo. The conditioner is meant to add shine and glossiness to your hair as it contains: raspberry oil, white grape seed oil and aloe vera! It also contains pro vitamin B5 like the shampoo to add strength to your hair.

Quite Frankly Flawless Finishing Polish 100ml (full size £10 LINK)
The finishing polish is a styling product that helps control and groom unruly hair. With chestnut extracts it gives you a soft flexible hold and moisturises with sunflower wax! 

Smoothed, Sealed & Sensational Volumising No Oil Oil For Fine Hair 30ml (full size £14 LINK)
This is probably the product I wanted to try the most! I'm loving hair oils at the moment, so being able to try one for just £2 was great! This hair oil is for fine hair, which is what I have, so hopefully this oil will work well for me! It contains violet extracts which leave your hair smooth, sleek and shiny as well as volumised! Again, this product contains vitamin B5 which helps restore strength and offers a form of heat protection.

Have you been able to try the Percy & Reed freebies?

Monday 4 March 2013

Nails Of The Day | Leather Effect

Nails Of The Day Nails Inc Leather Effect Soho Mews Nail Polish Review Belle-amie
Nails Of The Day Nails Inc Leather Effect Soho Mews Nail Polish Close Up Review Belle-amie
Nails Of The Day Nails Inc Leather Effect Soho Mews Nail Polish Label Review Belle-amie
Nails Of The Day Nails Inc Leather Effect Soho Mews Nail Polish Swatch Review Belle-amie
Nails Of The Day Nails Inc Leather Effect Soho Mews Nail Polish Close Up Swatch Review Belle-amie

I've been enjoying swapping up my nail polish quite a lot recently and one of my newest favourites is the Nails Inc Leather Effect in Soho Mews. I never got into the "leather look" nails trend when it first came out, purely because I didn't know whether it would look that nice on my nails. However, I was able to try one in this gorgeous tan colour, and I must say, I'm slightly kicking myself for not trying it before!

Like I've said, Soho Mews is a beautiful tan coloured nail polish which dries to a "Leather Effect" finish. I absolutely love the shade of this polish as it's neutral colour yet due to the texture, looks a lot more interesting on the nails. Soho Mews applies like a normal nail polish and is opaque in just 1 coat! This is something I love in nail polishes, when you can quickly apply 1 coat and head out the door knowing your nails look great! As the polish starts to dry, the semi-matte leather effect begins to come through. I found the polish to dry quite quickly and it was nice to know that once the effect had come through, your nails were practically touch dry! Once my first coat had dried, I applied a second just to make the colour even more opaque (seen in the photos above). I didn't apply a topcoat over Soho Mews as I wanted to keep the semi-matte, leather look finish. However, I did find that within a day the polish did chip, so I would recommend pairing a matte topcoat with it to keep the full effect! I really like the subtle leather finish of this nail polish and it looks great for either day or night wear. I actually wore this polish during the day when I was in town and then later on in the night for a meal out; it's a very versatile polish!

The only problem I have with this nail polish is that the packaging is quite tacky. I found that the leather effect on the lid looks a bit messy and I think would be nicer if it actually matched the colour your nails would be. But to be honest, the packaging doesn't bother me that much as the product inside is really good and the main reason you're buying it!

I'm really loving Nails Inc nail polishes at the moment. I find them easy to apply and the colour/ effects range is amazing! I would love to try the deep red version called Shoreditch Lane from the "Leather Effect" collection. I think it's such a pretty shade and would look lovely on the nails!

Nails Inc Leather Effect nail polishes are available on lookfantastic.com with free delivery!

Have you tried Nails Inc's Leather Effect nail polishes?

Saturday 2 March 2013

Tag | Confessions Of A Blogger

Confessions Of A Blogger Tag Belle-amie
Photo from weheartit.com and edited by me

I was tagged by the lovely Aly from Wonderland Beauty to do the Confessions Of A Blogger tag! I think tags are a great way to see the person behind the blog at a more personal level and get to know them a little better!

When did you start your blog?
I started my blog on 11th June 2012. It was a spur of the moment thing after I had come home from a Psychology exam, but I had actually wanted to make one for quite a while! Just never plucked up the courage until then!

Have you had any other past online presence before (Other blog, YouTube)?
Nope, I've never done anything like this before! I loved reading and watching beauty bloggers so I thought I would just give it a go.

Why did you start your blog?
I loved reading other people's blogs and knew I wanted to create my own space on the Internet. I've always been an arty person and enjoyed creative writing, so thought this would be a great place for me to share my interests! I made my blog at the same time I decided to study Beauty therapy and thought it would be a great to put on my CV to show my love for beauty and makeup! Very quickly, I fell in love with writing all different kinds of posts, from reviews to favourites, so now this blog is my hobby! It's something I love doing and was one of the best decisions I've made.

When did you become serious about your blog?
To begin with, I had no idea whether I would stick with writing a blog and if it would be for me, so it wasn't serious at all. After a month or so, I realised my blog was going somewhere. I began to really enjoy updating it and other people seemed to like my posts! I wouldn't call myself a "hard-core" blogger, but someone who spends their free time working on my little creative outlet. I would say within the last few months I have become a lot more serious with my blog and I enjoy it this way!

What was your first post?
Oh no haha! My first post was an introduction about me, but my first proper blog post was my Barry M Nail Paint Collection. I used my iPod as the camera so the pictures are terrible quality! Luckily it's not too embarrassing, but I am thinking of remaking that post!

What has been your biggest challenge about blogging?
I wouldn't say I've come across many challenges with writing my blog, I usually just go at my own pace and try not to get too stressed about it. Sometimes I have huge blogging blocks and have no idea what to post about, but that gives me the chance to take a mini break and think it over, I would never like to force myself to write!

Where do you see your blog in one year?
Well, one thing's for sure is that I will still be here! I love my blog and don't see myself giving it up anytime soon. To be honest though, I have no idea! I haven't even been blogging for a year and I'm already very overwhemed with how it's turned out! If it's anything like this year, bring it on!

What is the most rewarding thing to you about blogging?
I would definitely have to say the amazing community and the support everyone gives you! Anything from a lovely comment to knowing that there are people out there you can easily talk to and ask for help if you needed it!

What is the most discouraging thing that happens to you?
I've never had anything too discouraging happen to me, I've had quite a positive experience so far. The only thing I'm quite guilty of is comparing my blog to others and then feeling down that mine isn't very good! It's not a case of jealousy, just "ahh why didn't I think of that" or "her font's better than mine", very silly things. I know everyone's blog is personal and different, so I shouldn't feel down about it! But I guess it's a natural feeling and to be honest, it's not very often at all that I feel this! I am happy with my blog!

What's your lasting inspiration or motivation?
Every blog and every blogger I've seen! All of them inspire me in someway to help me develop as a blogger. Just seeing a good post or reading about someone's experience can inspire you to keep going. This is why I think the blogging community is such a wonderful place! On a more personal level, my main motivation is bloggers who are strong people and will carry on with their life even when the going gets tough! I'm trying to become a stronger person myself, so I'm always inspired by those people.

I hope that you enjoyed this tag and that you answer these questions yourself, I tag you all! If you've already done this tag, I would love to read your responses so feel free to link them below!

Related Posts Plugin for WordPress, Blogger...